

The Pros and Cons of Creating with Colored Clay
Interested in learning about
colored clay, its challenges and rewards?
Here’s my experience.
If you are a ceramic lover or dabble in ceramic yourself, you might have encountered striking ceramic pieces made with Nerikomi or Agateware techniques (more on what these words mean here) and wondered “how did they do that?” What kind of work and challenges goes into making a piece with this technique?
In brief, before you can create any piece with colored clay, you need to make the clay by adding stains to it. But what are the upsides and downsides of working with colored clay? Let’s start with the negatives:
Stains before getting into the clay
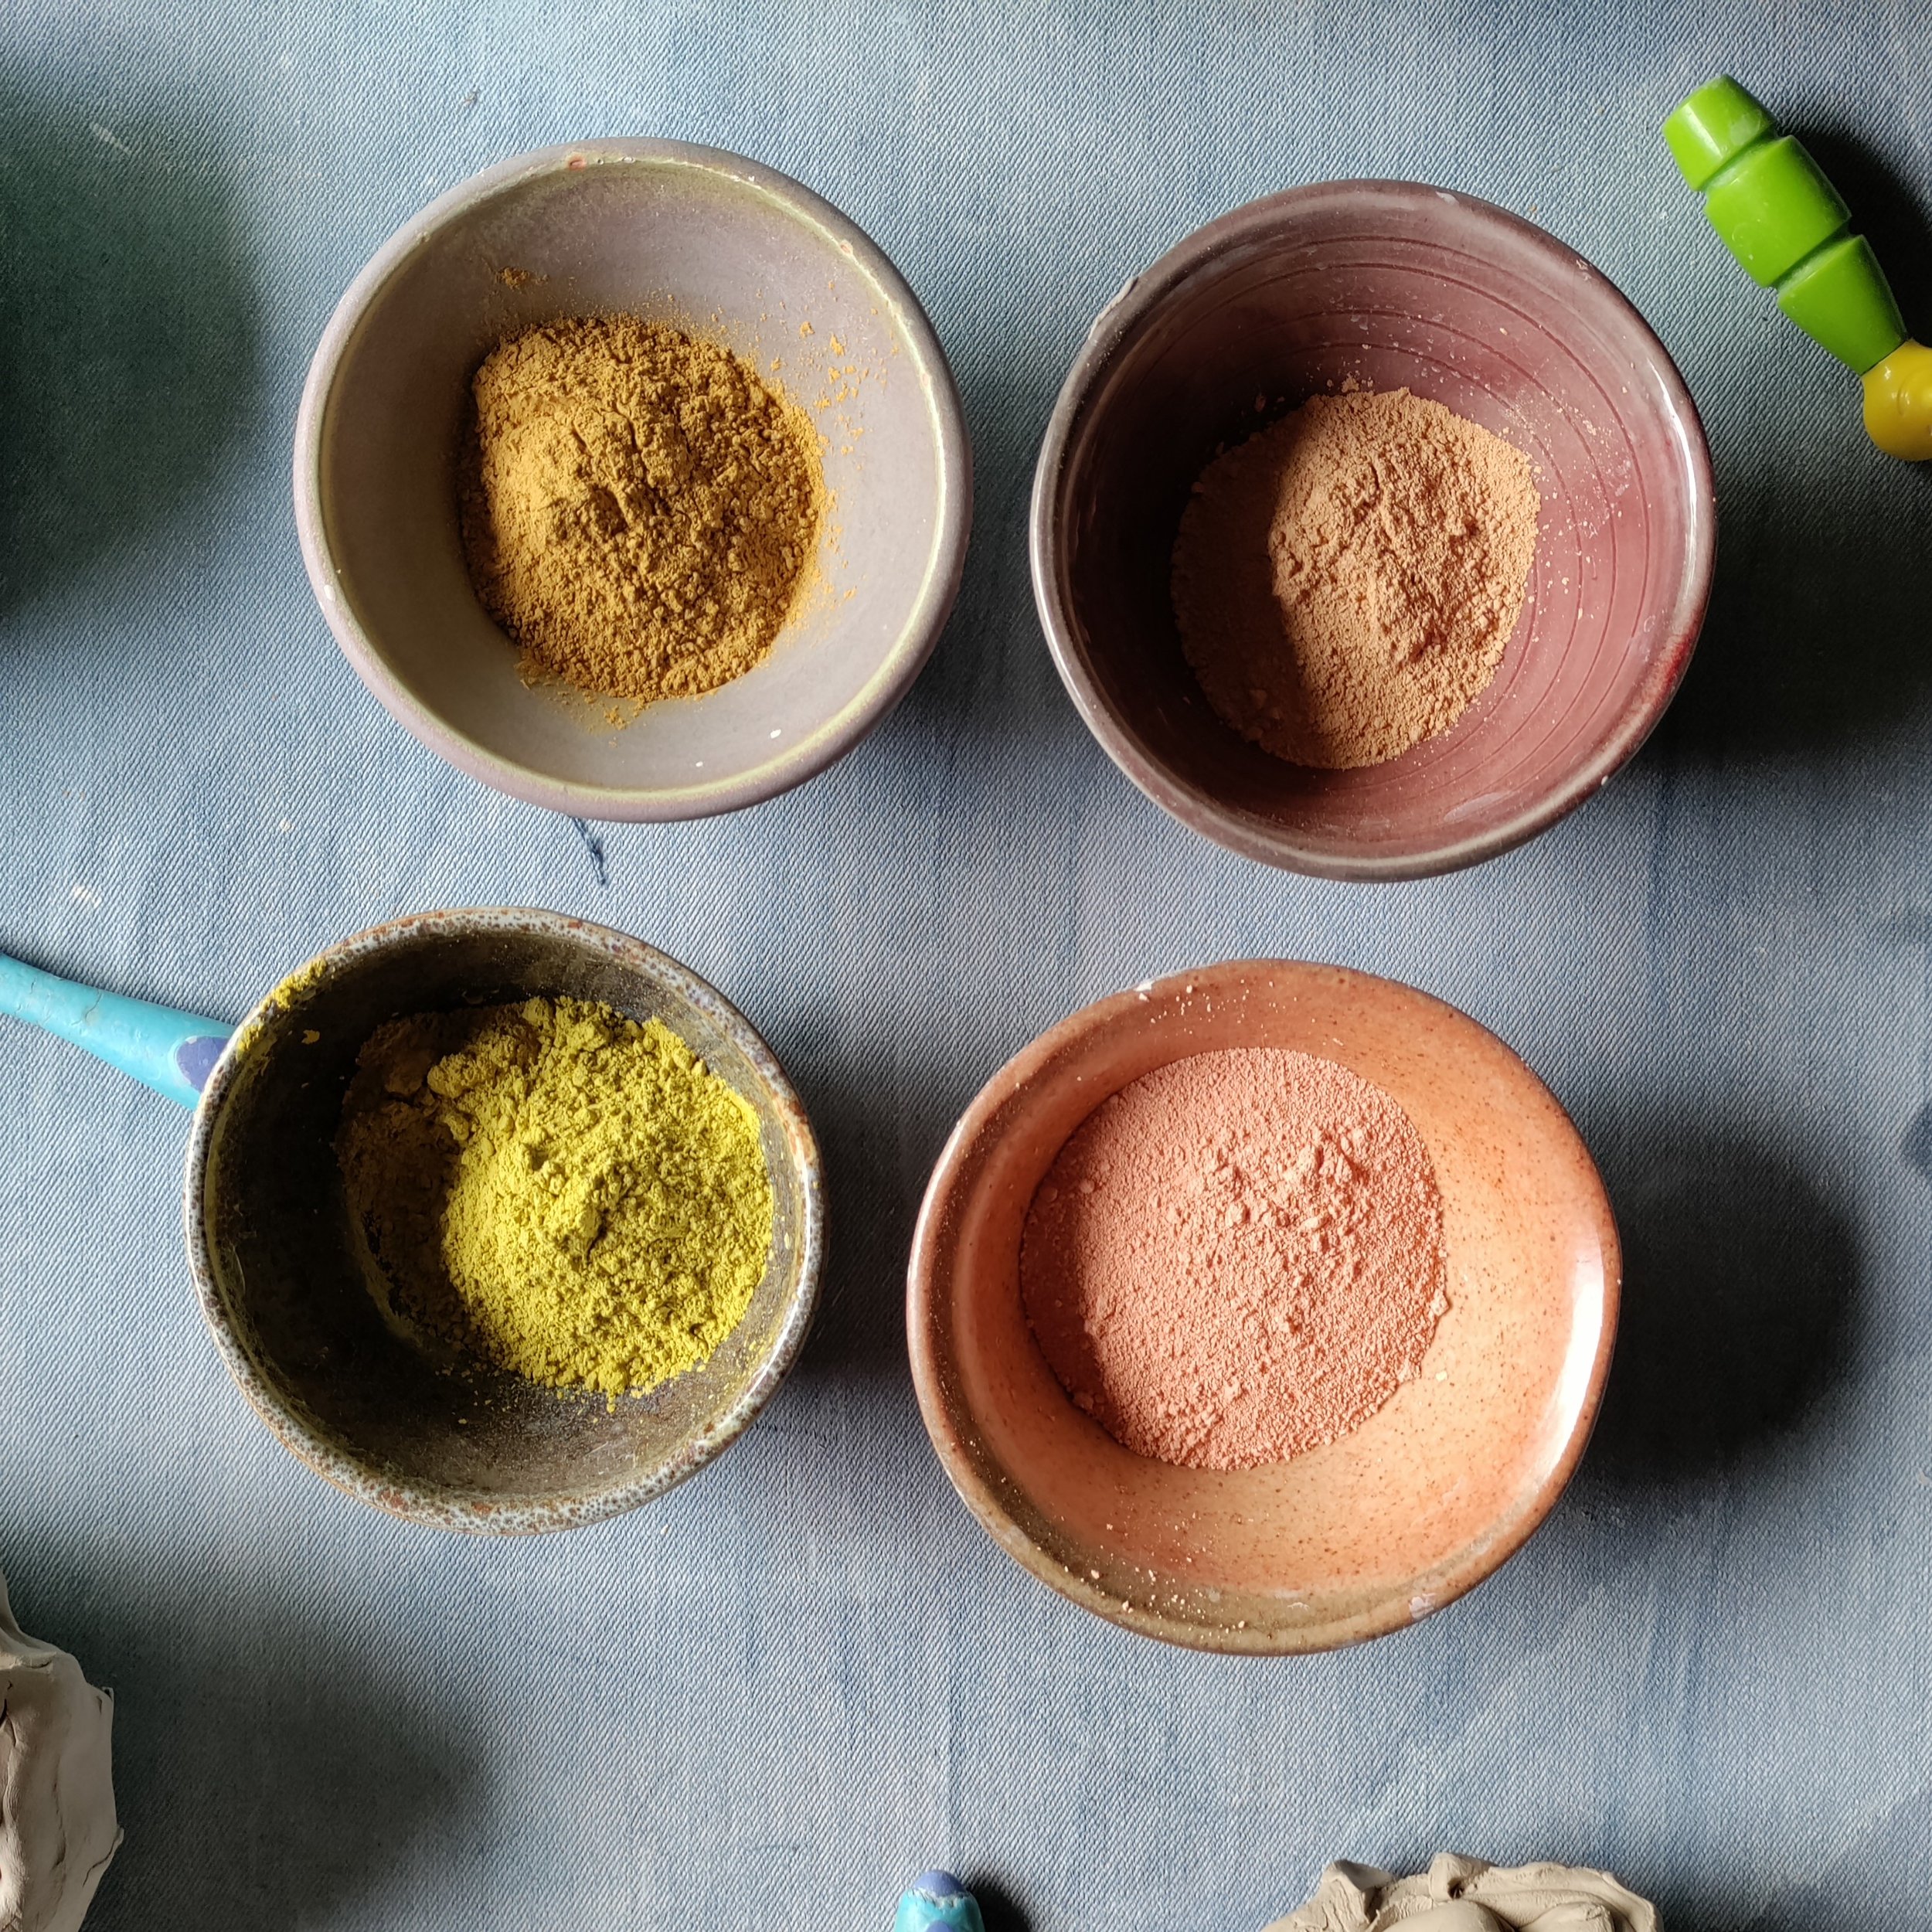
1) Stains are expensive. It takes a fair amount of stain to color clays, more than you need in glazes and slips and they are not cheap.
2) Stains are toxic to breathe. You need to wear a protective mask when you’re making the clay, and you need to wear gloves if you have cuts or sores on your hands while handling the clay. That being said, the stains are made with a specific technology (more information here) that allows them to be food safe, but it is still a good idea to cover pieces that are going to be in contact with food with a clear glaze. This technology is the main difference between stains and oxides. Oxides can be used in the same ways stains are but are more likely to leach out and be hazardous to your health. More about the difference between oxides and stains here.
3) Making the colored clay takes extra time and makes a mess. They are easier ways (mixing dried clay with the pigments and water in a blender) but it requires some organization and commitment. If you’re just starting, you’ll be doing a lot of wedging and it’s physically demanding, especially if you have arthritis or hate wedging (and who doesn’t?).

Freshly Made Colored clay

Stains are toxic to breathe! Make sure to wear a dust mask when handling them in their powder form. Glamourous, isn’t it?
4) Designing a pattern to create a Nerikomi block is another extra step required that doesn’t exist when you just use clay out of the bag. Before you can make something, you have to arrange the colored clay to create a pattern and make a slab or a block. It takes time.
5) Once you’ve made a piece with colored clay , it’s prone to cracking. You need to handle the clay in a really wet stage to make sure that all the clays are the same wetness and consistency. Cracking still occurs.
6) To avoid the cracking, you need to let your pieces dry for a long time well wrapped up. I let mine sit for a minimum of two weeks. It takes space on your shelf and is difficult when, like me, you’re impatient.
7) When pieces don’t work out, or when you cut the slab edges or trim your pieces, you end up with colored clay scraps and it’s sometimes a pain to figure out what to do with them. If you mix them all together, they become this light gray clay that’s not very inspiring, and after all the time it took to make the clay, you don’t want to lose their color. But I actually like scraps because it’s allowed me to experiment with new ways to use them and develop new techniques so it’s not really a con in my opinion.
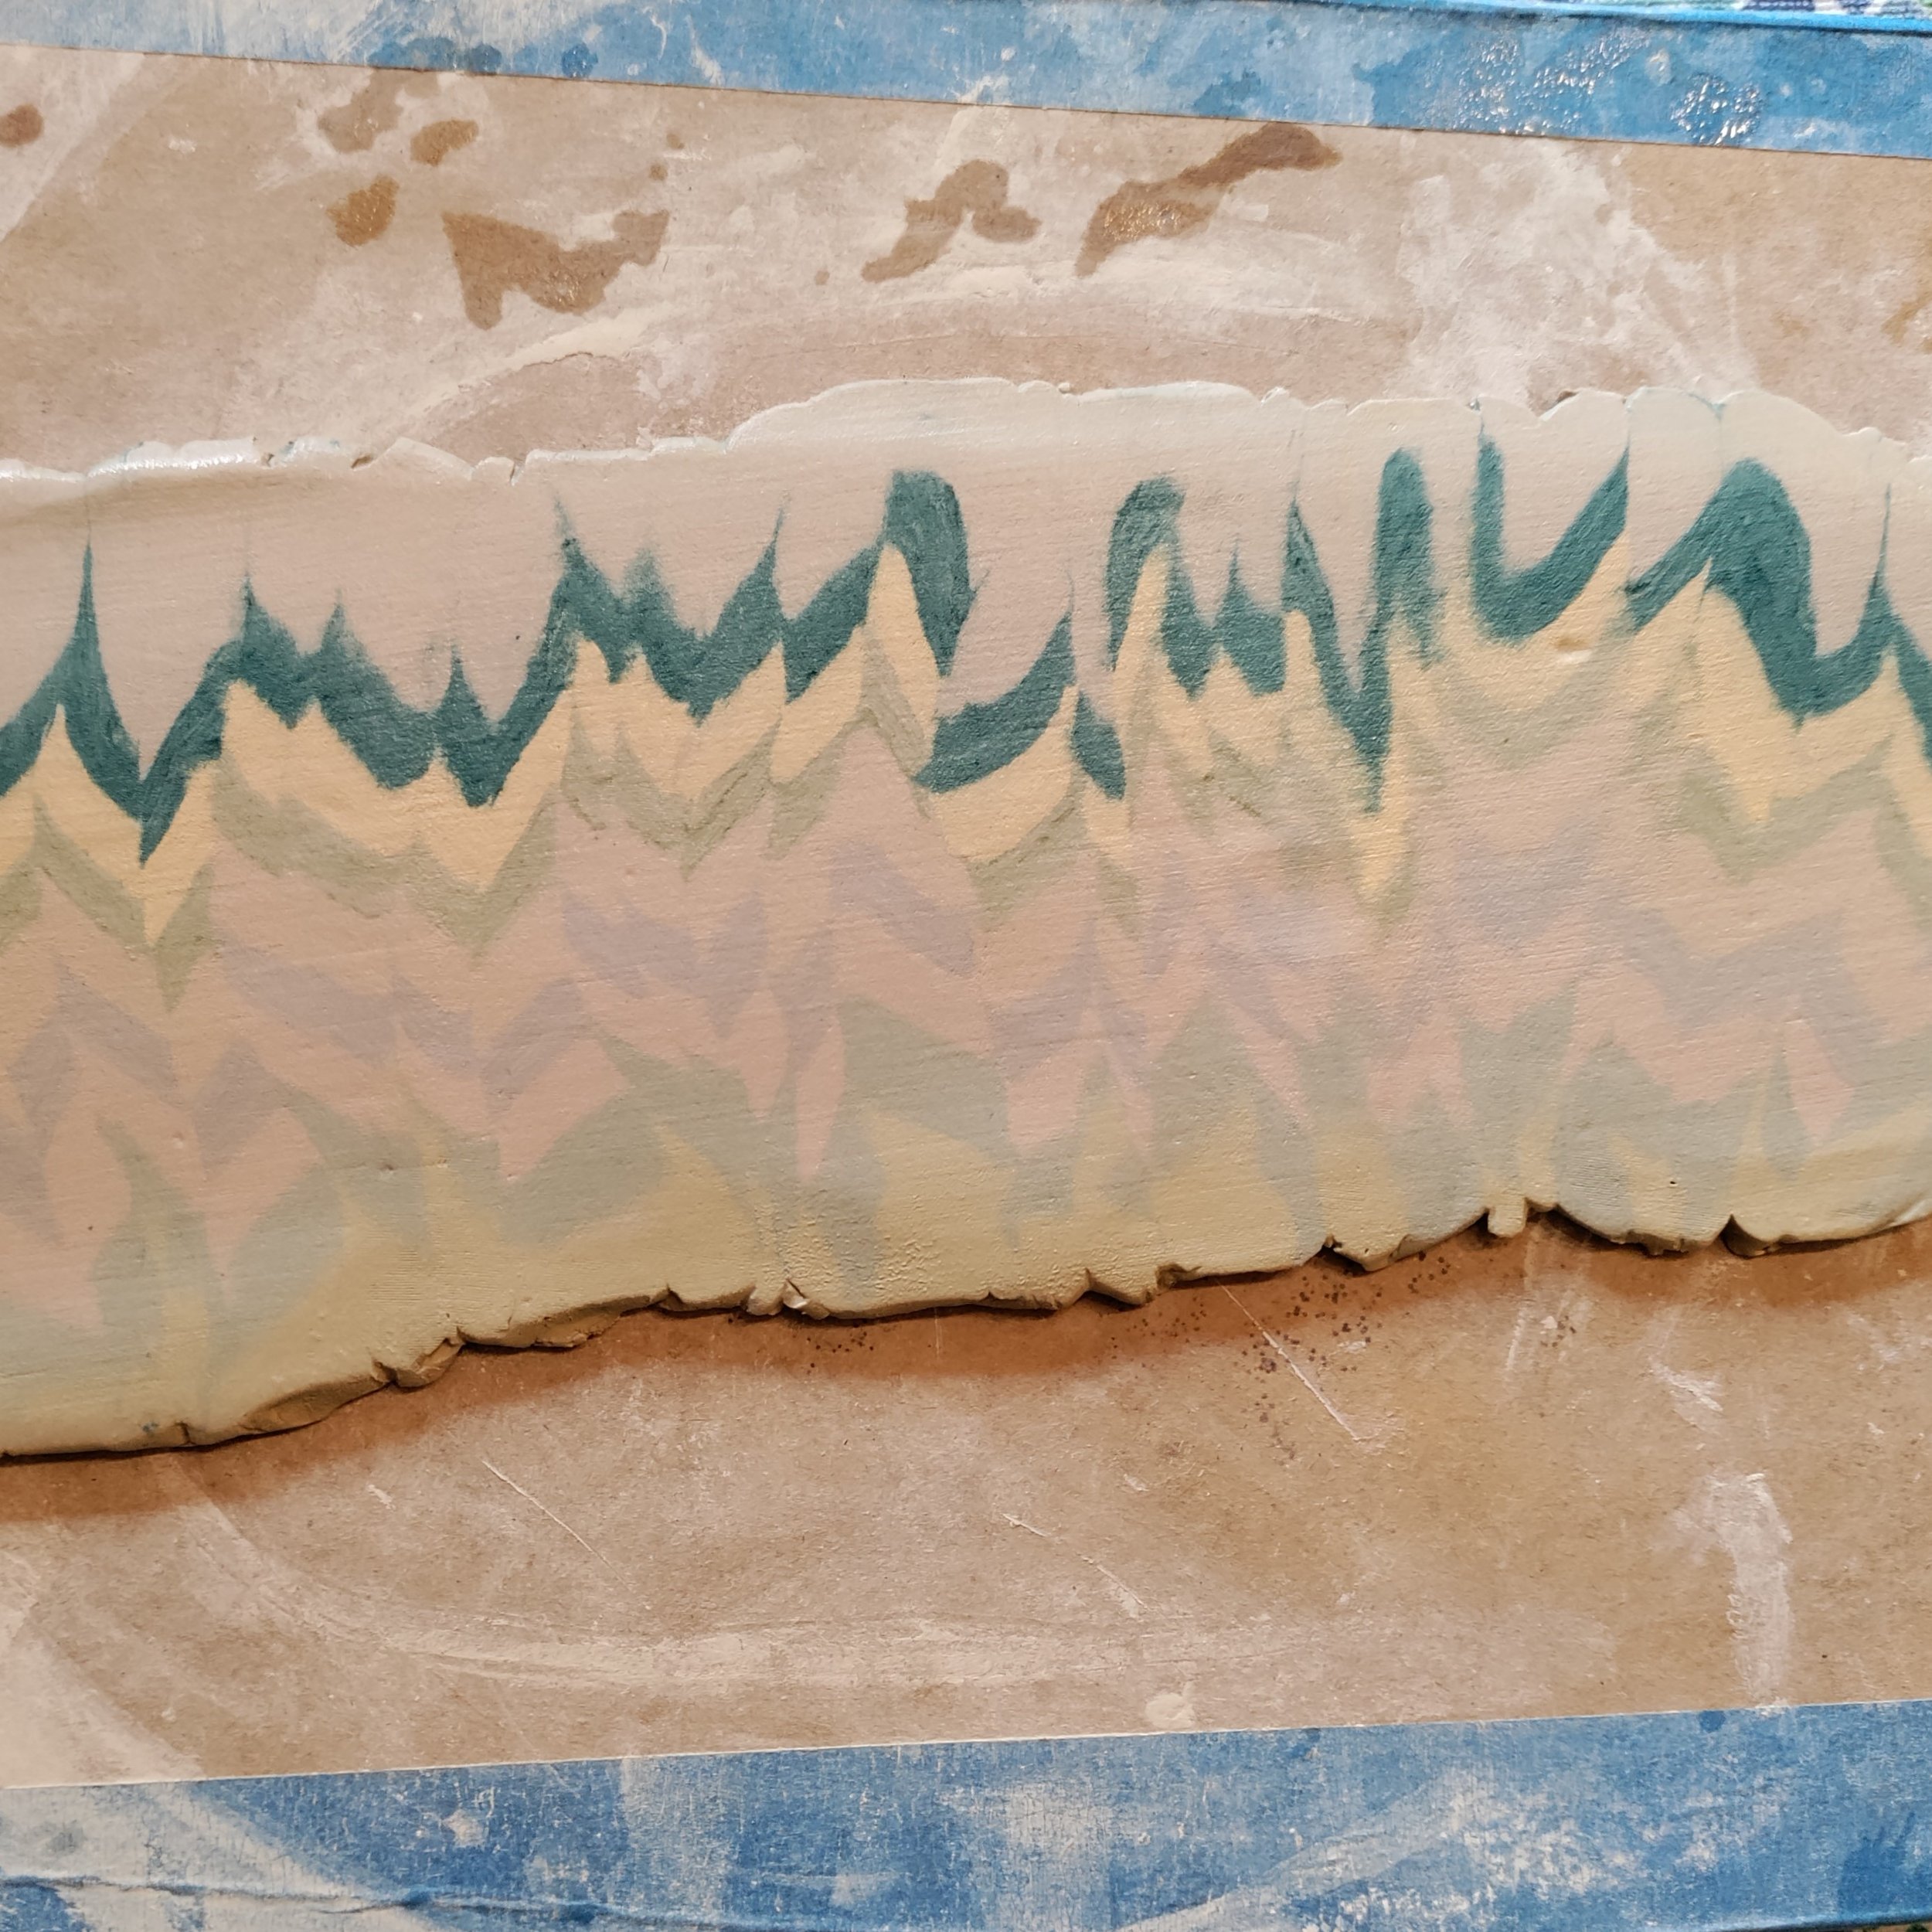
Freshly Made Nerikomi Pattern
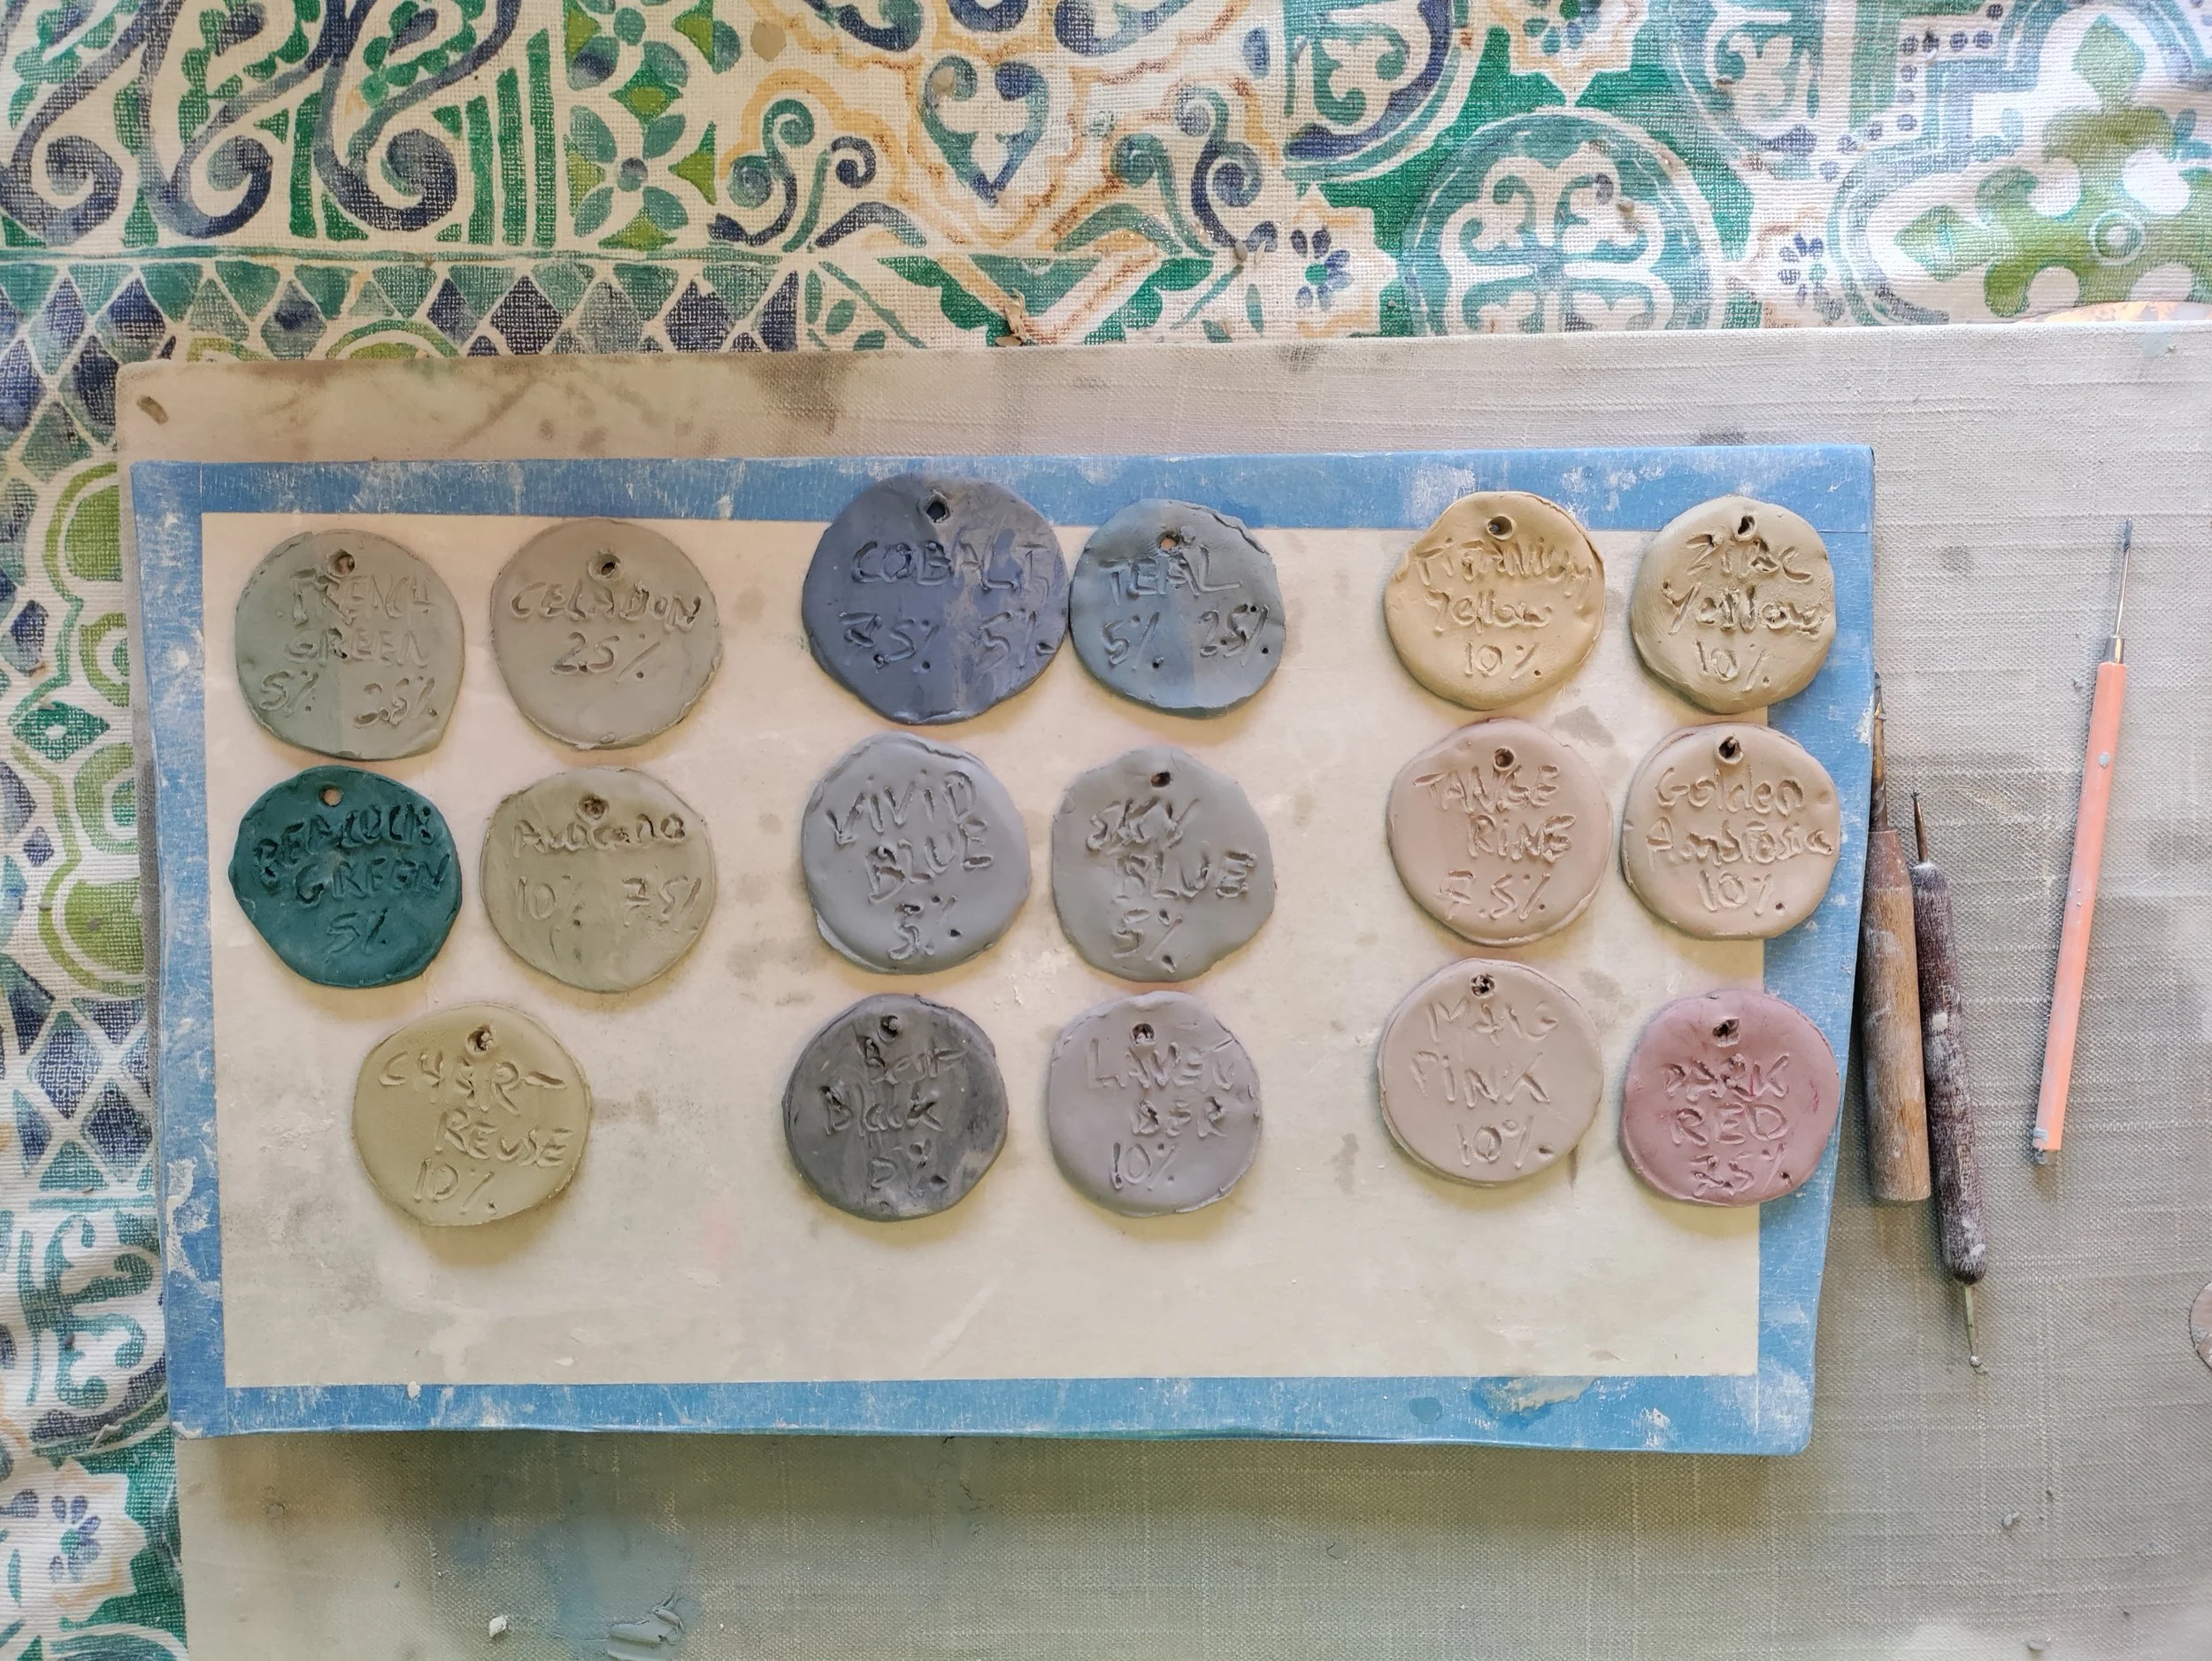
Colored Clay Test Tiles (clay has not been fired yet)
8) You need to sand your pieces once they’ve been bisqued to eliminate smudges. That is another step where you need a protective mask and if possible do it outside. Clay dust is silica, and it’s bad if you breathe it in.
9) Depending what temperature your pieces get fired at, some colors will disappear. You need to read the small prints on what temperature each stains can handle, and make test tiles. Some colors do better at higher temperature than they’re supposed to. The type of firing (oxidation or reduction) will also have a different effect on the stains. One of my pink stains turned out a beautiful baby blue after a reduction firing. (pinks and purples are the hardest colors to “get” consistently) You never know, and it’s part of the fun.
But there are a lot of positives, and for me they’re totally worth the hassle.
1) You create beautiful patterns that are very distinctive compared to other decorative techniques in ceramics and end up with unique results. Two bowls with the same glaze are going to look similar, but two bowls made with the same mold and the same Nerikomi pattern will still look quite different because of color choices and how thick/thin and distorted the pattern will get when it is rolled out.
2) You get to play with lots of colors. It’s great fun.
3) I always get surprised to discover what the pattern turns out like when you are rolling it out, but also after each firing because colors get brighter and your piece gets more vibrant.
4) Glazing is not always necessary since you already have colors and designs on your pot, and if you do you’re going to use a clear glaze usually, so the glazing process is a lot easier.

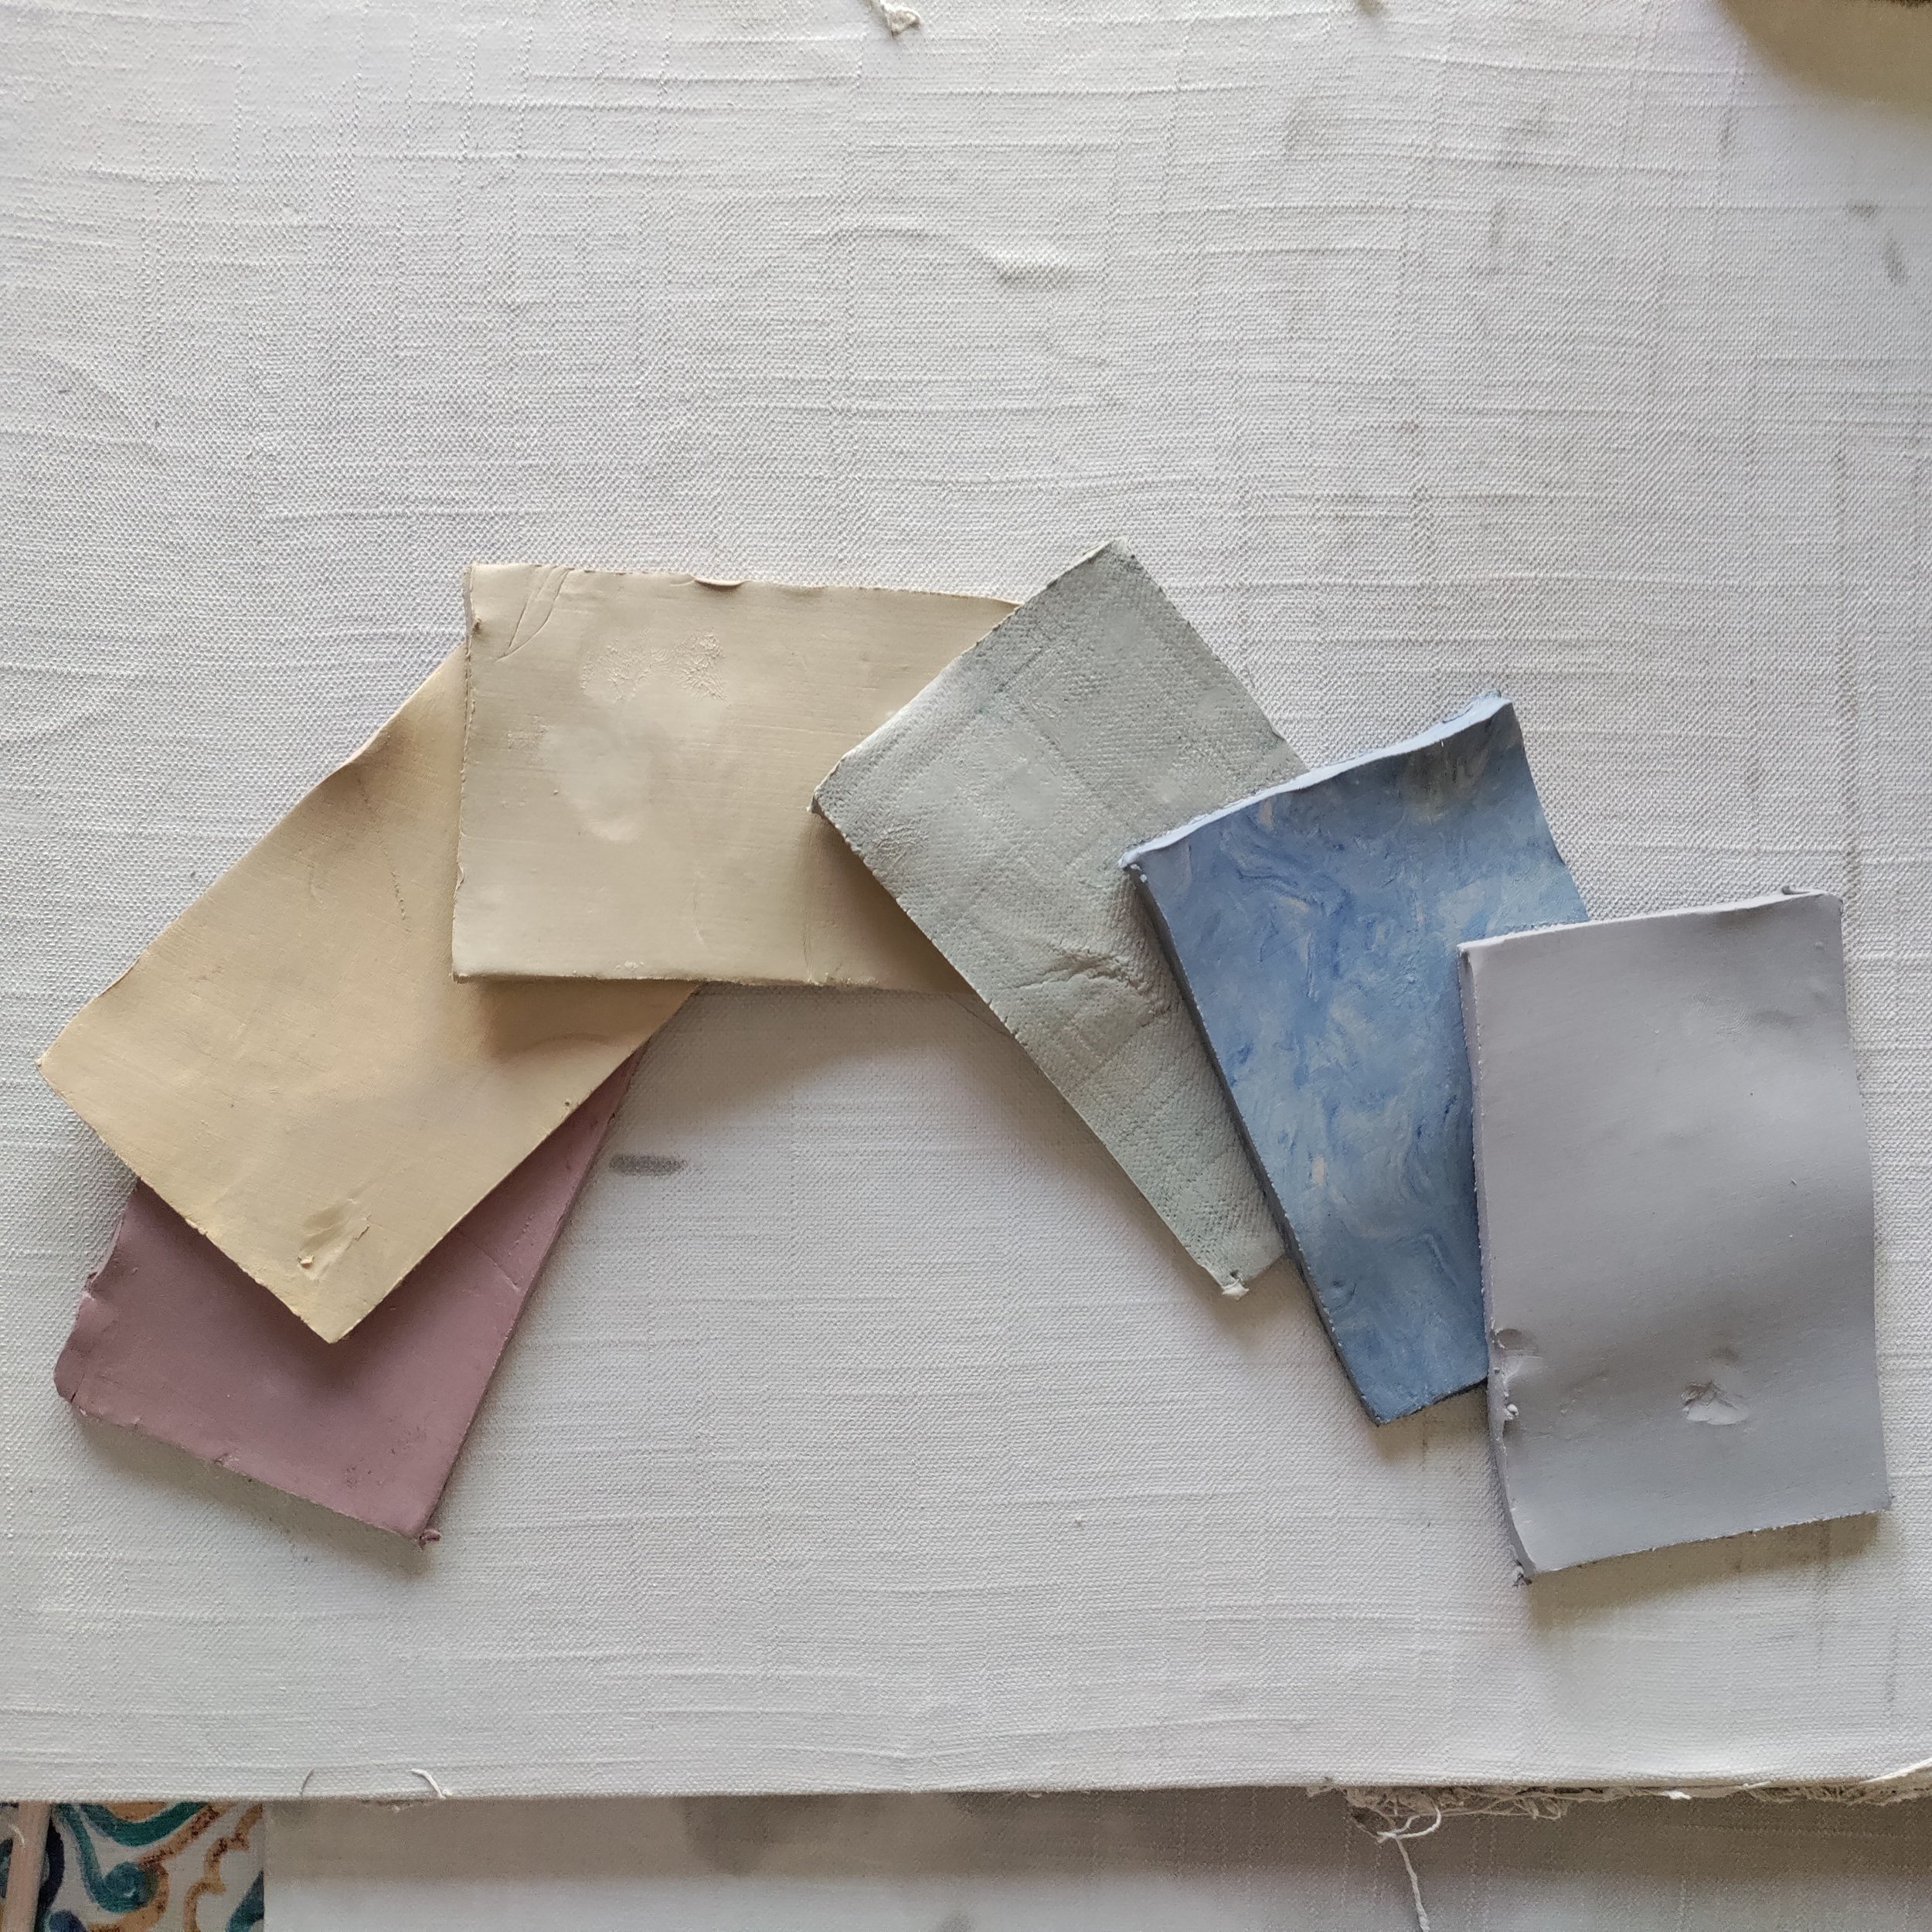
Colored Clay Test Tiles (clay has been fired to cone 10 -@1200 degrees celcius/ 2100 degrees Farenheit)
5) The pattern is in the clay, so you see it on every inch of the pot, unlike glazes where you need to leave foot clear or underglaze painting or carving which are done on the outside of a pot.
6) Creating a block of Nerikomi means that you can repeat the same pattern over and over and create sets that match together very easily even if the shapes are different. You can leave a pattern for a while and then get back to it. It will keep for a long time if you keep them in a sealed container and spray them with water from time to time.
6) Besides Nerikomi, you can explore lots of different techniques with colored clay and stains : colored slips, colored coils, using colored clay on the wheel, use as a watery paint to decorate the surface of your pots (I like to stamp writings on my pots with it), find creative ways to use your scraps, there are lots of options.

Step 1: making and selecting colored clay
Step 2: shaping the clay

Step 3: assembling the pattern

Step 4: incorporating the pattern into your ceramic pieces